How to Upload Webflow to a Site
Hosting Webflow Sites for Free: The Definitive Guide
Practise yous feel like Webflow's hosting prices are a bit steep? This guide volition teach you how you tin can host your static Webflow sites for costless.
Interested in trying out Webflow ? Feel free to do so. By using my chapter link, I'll become a small-scale commission, which will help me lots. Thank y'all so much :)
Hosting on Webflow
There'southward no uncertainty that Webflow has some really crawly features that are useful for both designers and developers.
Yous can run almost any blazon of projects on at that place. Your company site, a large article heavy blog, a full fledged ecommerce store and almost whatever other blazon of project you can come up with.
The downside is something that yous often tin see complained about on the Webflow forums: the price.
This makes sense though.
You have access to a agglomeration of easy to utilise tools for your websites, which logically will cost you a premium price.
Y'all may not like information technology, but the prices are what they are. Zip to do well-nigh information technology.
Or is there?
Webflow hosting pricing organisation
Let me explain how the Webflow pricing arrangement works. It can exist a flake confusing for some.
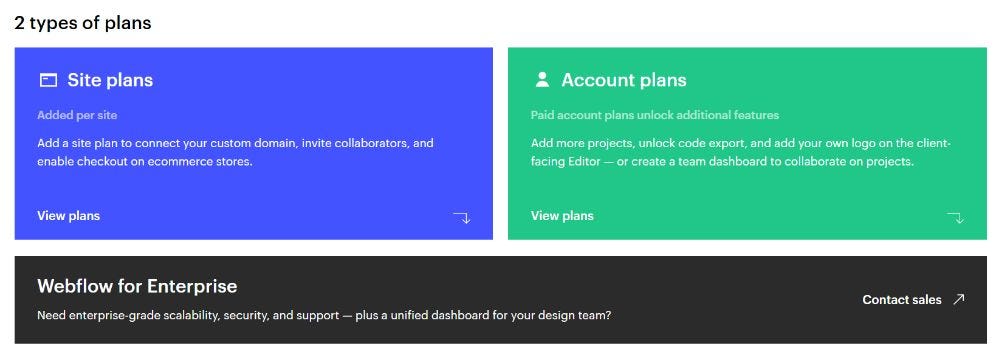
There are two kind of plans for you to use:
- Business relationship plans
- Site plans
The account program has three tiers; free, low-cal and pro. Yous can read more about them by checking out the official Webflow docs.
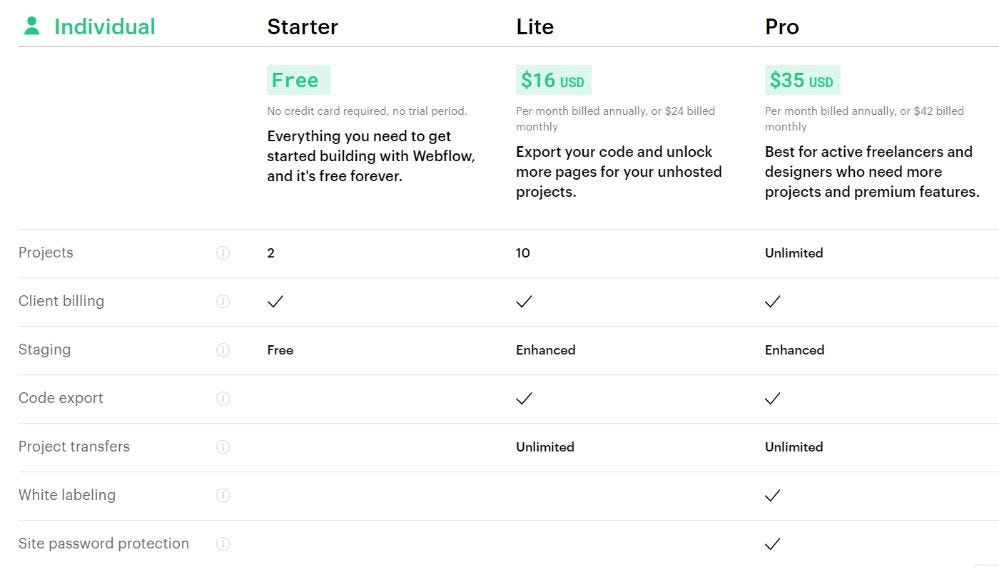
The costless tier gives y'all basic access to building a couple of projects, while the paid tier gives you a few more projects, some more bandwidth and the most important affair for this guide; the ability to export your code.
This is all well and good.
If they didn't have whatever limitations in place, the servers would probably be overloaded with people building and publishing sites on the free tier.
Let's become on to the site plans.
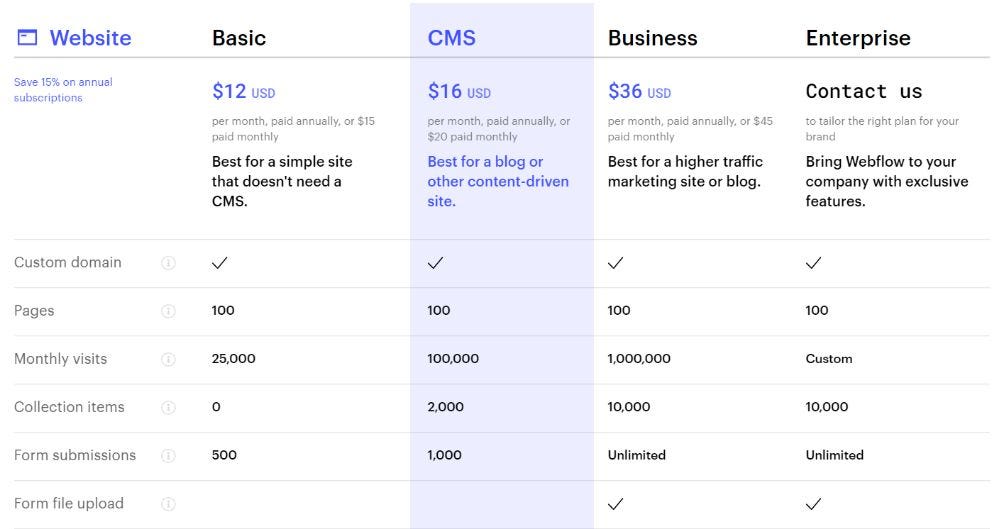
There are 4 tiers that gives you the ability to publish and host your sites on Webflow's systems.
- Basic — $12 / month yearly, or $15 month to month
- CMS — $16 / calendar month yearly, or $20 month to month
- Business — $36 / month yearly, or $45 month to month
- Enterprise — Custom pricing
And then what does this tell us?
In order to host a static site with Webflow, you will have to pay a monthly price of at to the lowest degree $12.
I feel like the CMS plan does make sense. You get access to a really like shooting fish in a barrel publishing tool that easily can pay itself off if you're using it right.
But what about for a pocket-sized site that doesn't demand to be constantly updated with the content management system?
I feel like $12 per calendar month is quite a steep price for those kind of sites, particularly when there are so many cheap and free alternatives on the marketplace.
Let'due south get through some alternatives.
Free deployment platforms
When doing some enquiry of complimentary hosting alternatives, you lot will probably come up across at least a couple from this listing.
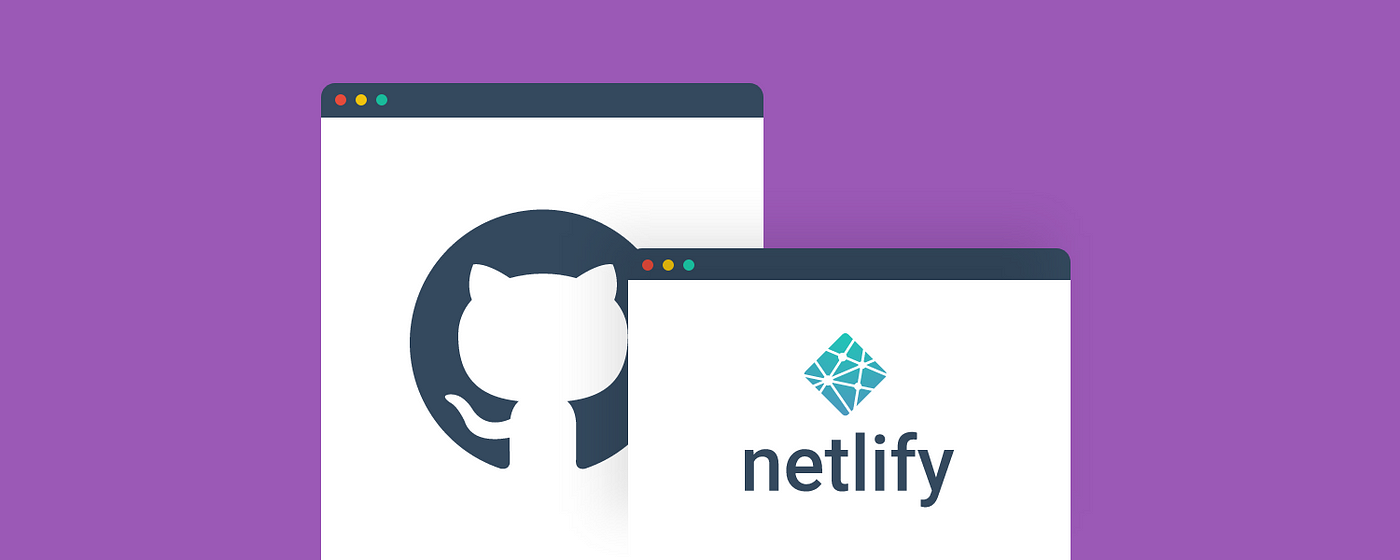
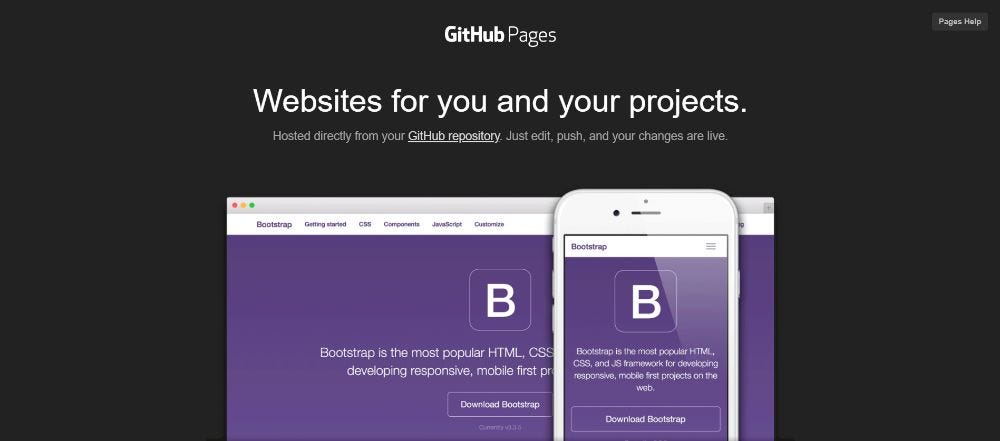
- Github Pages
- Netlify
- Google Firebase
- Amazon Web Services
- Heroku
All of them are created by large to super big businesses, which makes them able to give away quite generous hosting plans for free.
In this guide I'll explicate how you tin deploy your sites on two of the easiest deployment platforms on that listing: Github Pages and Netlify.
What kind of projects are you able to host for free?
This guide is mostly directed to static projects that doesn't need a content management organization and form treatment.
If you take a basic knowledge of HTML, CSS and Javascript, you lot're able to update your site directly through the exported code though.
Only okay, enough talking. Let'south jump direct into deploying a site on Github pages.
Hosting using Github pages
Uploading and deploying a static site on Github pages is probably the easiest way to get a site upwardly on the web without having to pay anyone anything.
It can be done in a few easy steps:
- Create a Github account (if you don't already have 1)
- Create a repository
- Upload your lawmaking into the repository
- Connect a domain
- That's it
Let me go through the process step by pace, starting with exporting lawmaking out of a Webflow projection.
Exporting your code through Webflow
In order to complete this stride, you will need two things:
- A Webflow lite account plan
- A Webflow project that you desire to use
Start past opening your Webflow project in the designer view, and hitting "Export lawmaking" in the top right corner.
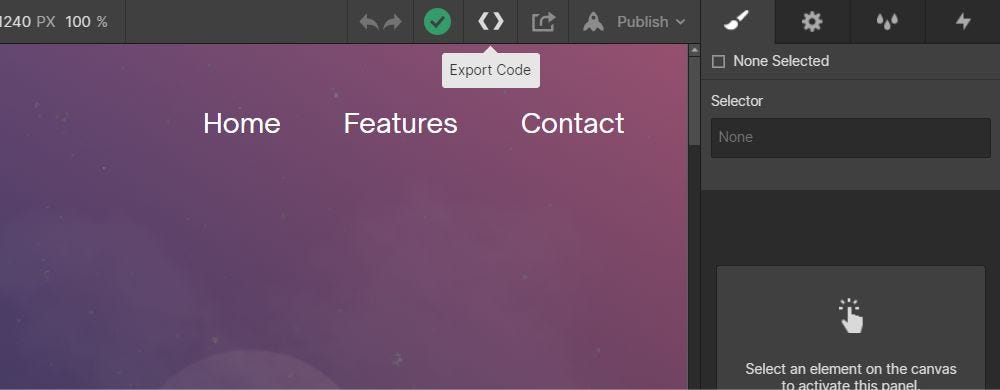
A popup will pop up (hehe), and prepare the code for yous. Click "gear up nil" as soon as the loading has finished.
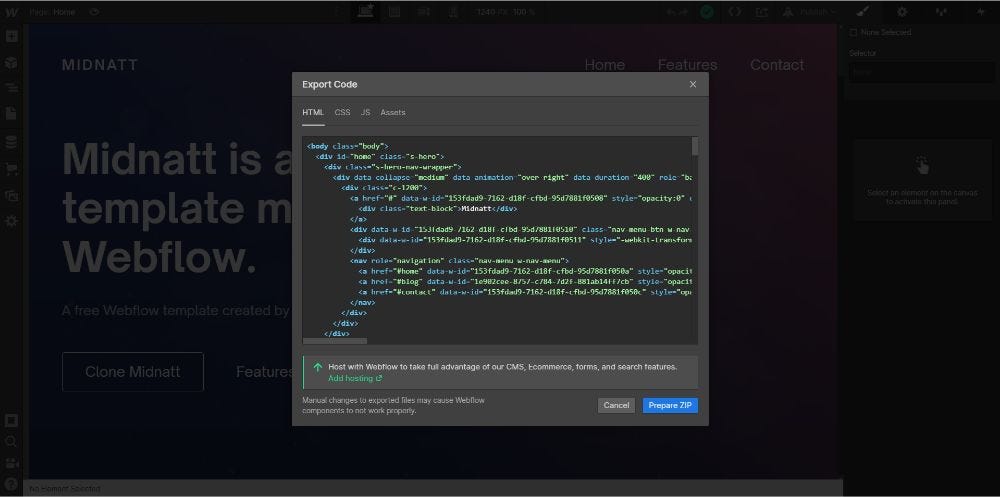
Then simply hit "download zip" and a compressed null file will download onto your computer.
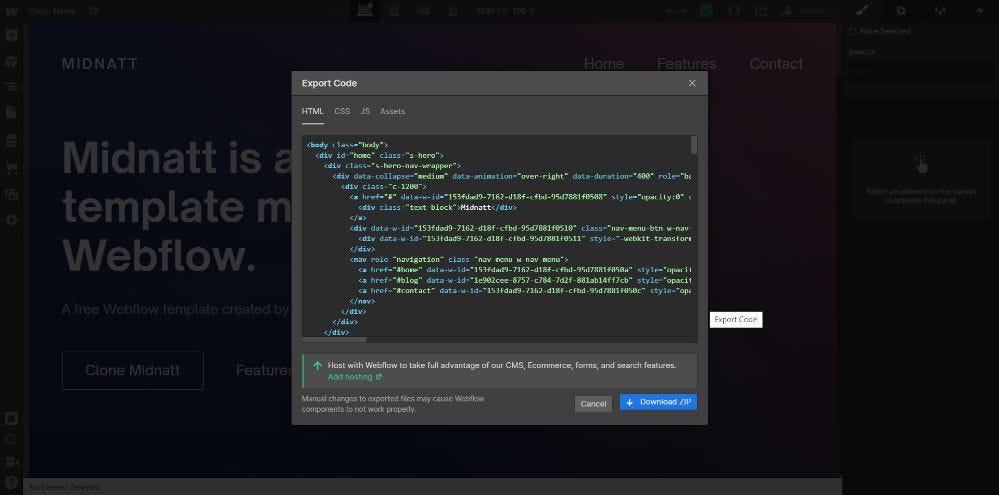
That's all at that place is to it. Excerpt the null somewhere on your desktop and let'due south get onto the next stride.
Creating a Githup repository
In order to host your site with Github pages, it needs to be placed inside a Github repository.
A repository is basically a spot of memory in the cloud on which your code can exist uploaded to and downloaded from.
There are a few different means of uploading your code on Github. We'll take the piece of cake way.
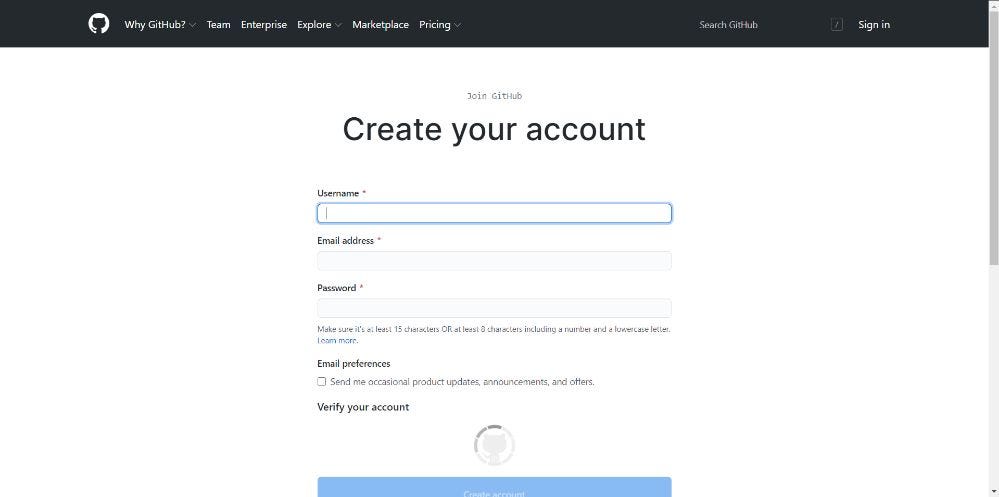
If you lot don't have a Github account, this would exist a skillful fourth dimension to set one upwardly. The registration process is simple and works just as on any other website out there.
After finishing setting up your account, go on into the adjacent pace.
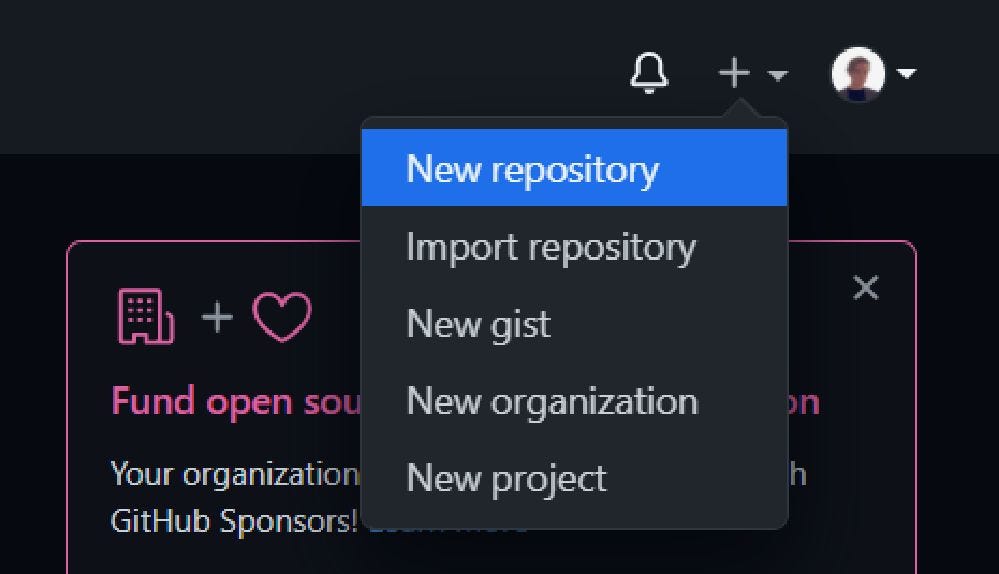
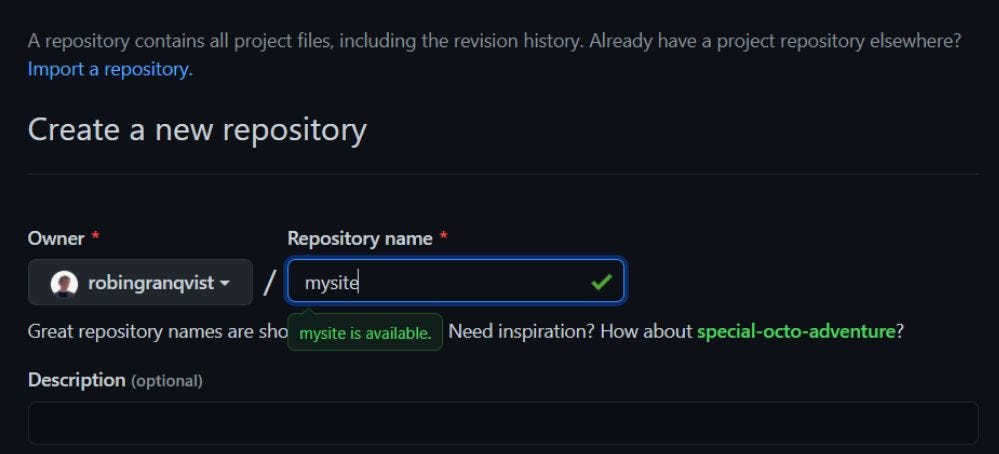
Click on "create new repository" and name the repository whatever you like. The name doesn't really matter hither.
Uploading your lawmaking into the repository
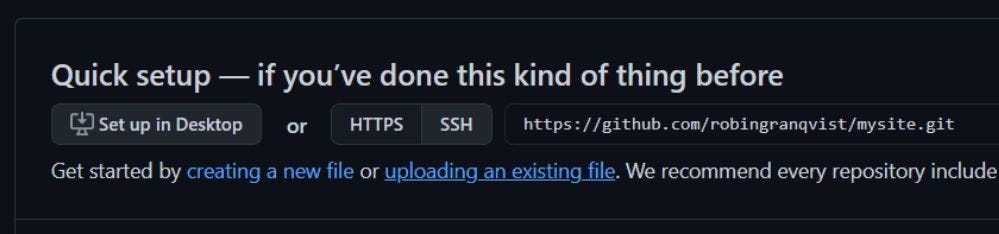
The instructions for the quick setup may seem a fleck intimidating. You tin can upload files into the repository in many unlike ways:
- Using a final and SSH
- Using the Github desktop app
- Only uploading through the browser
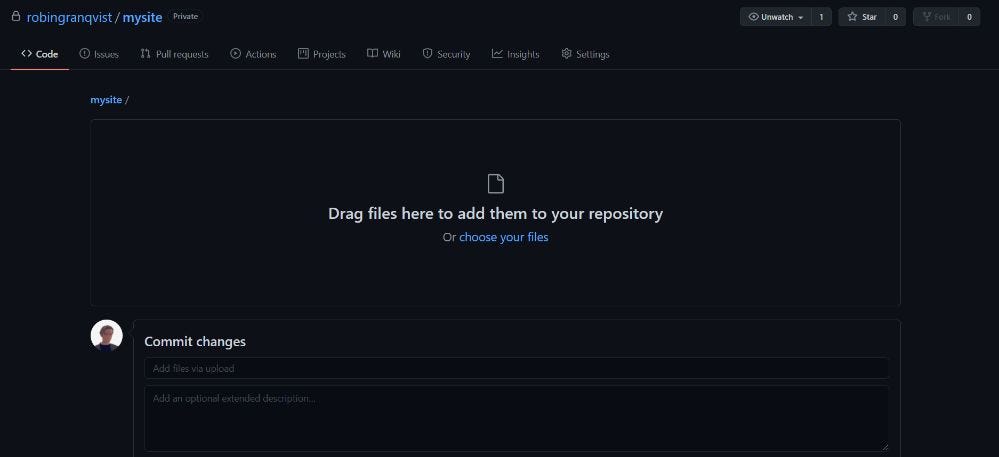
I'grand gonna go with the browser upload method in this guide. Press the lilliputian "upload an existing file" pick.
This will redirect you to a page on which y'all can drag and drop files into the repository.
Yous should drag in all the content that exists in your exported lawmaking from Webflow.
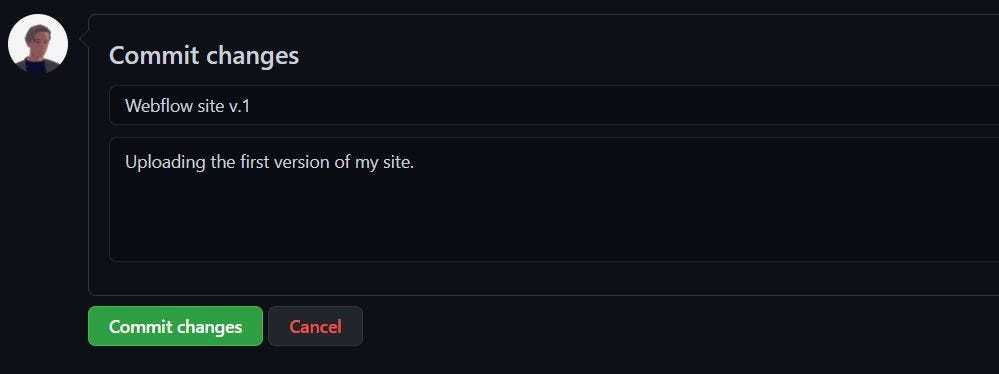
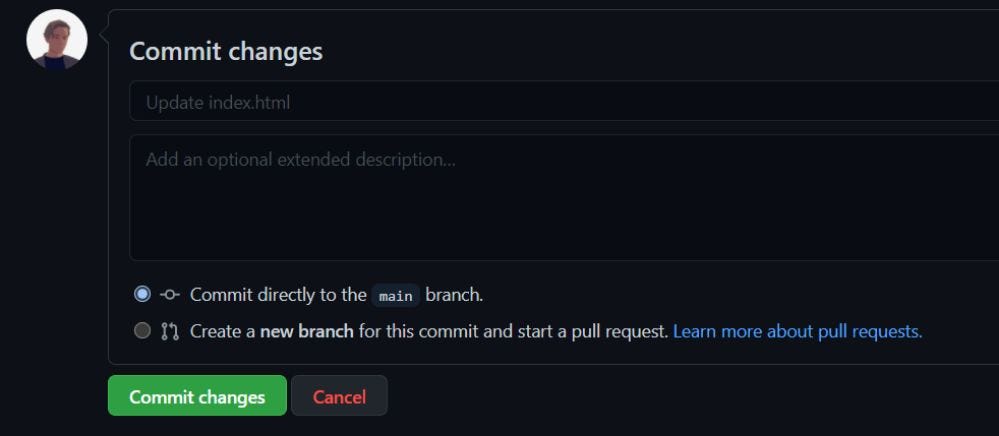
Saving files in your repository is called to "commit" them. Press the piffling commit push and your files will be saved.
Optionally you tin write a message and / or a clarification for your commit to keep yourself organized. This isn't required though.
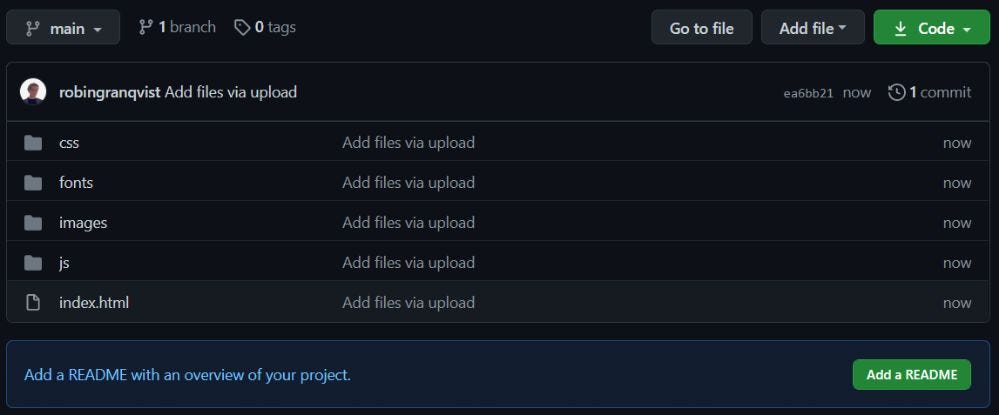
Great. Github will now process your files for a minute or two, and so you have your site uploaded and commited within a repository.
Your repository should expect something similar this when you're finished:
Setting up the repository for Github pages
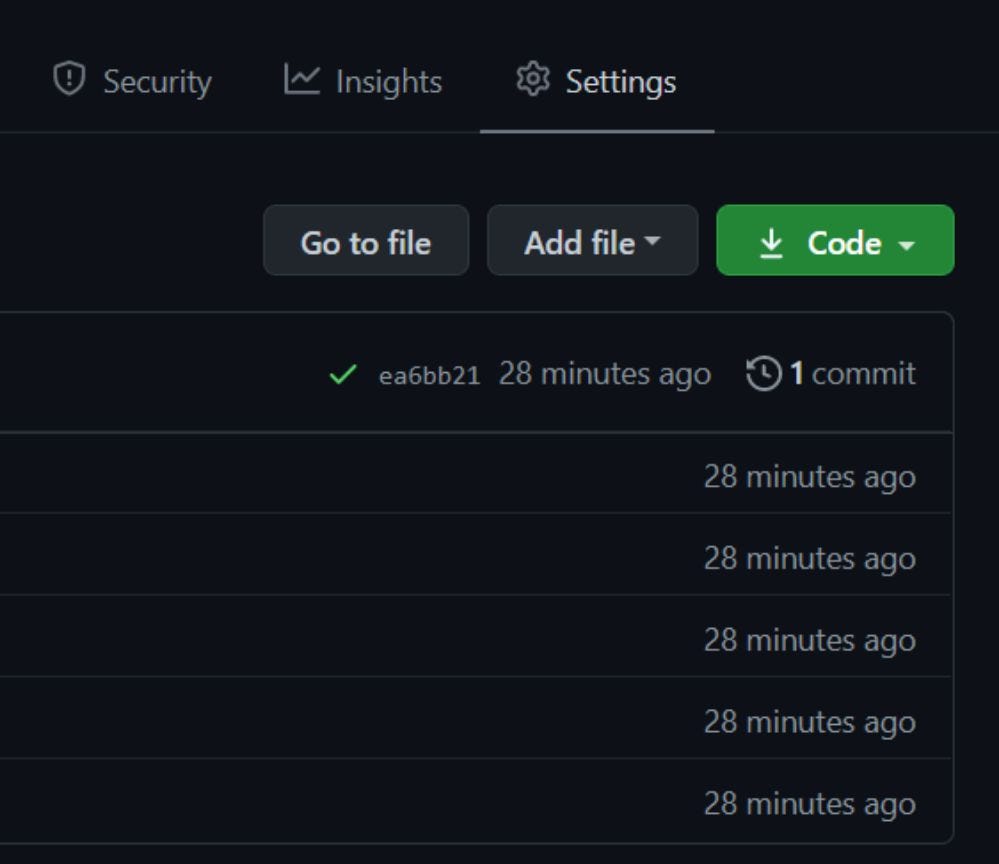
Go to your repository settings by navigating into your repository and clicking the "settings" tab on the right.
Roll to the "Github Pages" section and select "primary" or "master branch" as the source for the site. If you haven't changed any brances, the master co-operative should be the one containing all your lawmaking.
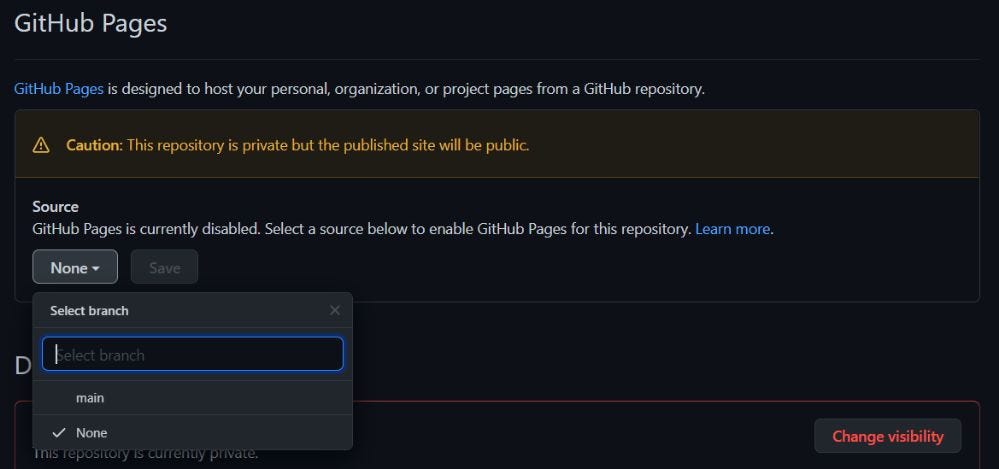
Now cull the binder in which you take your files. In my instance, I uploaded the extracted folders content straight into my repository, then I'll choose "root".
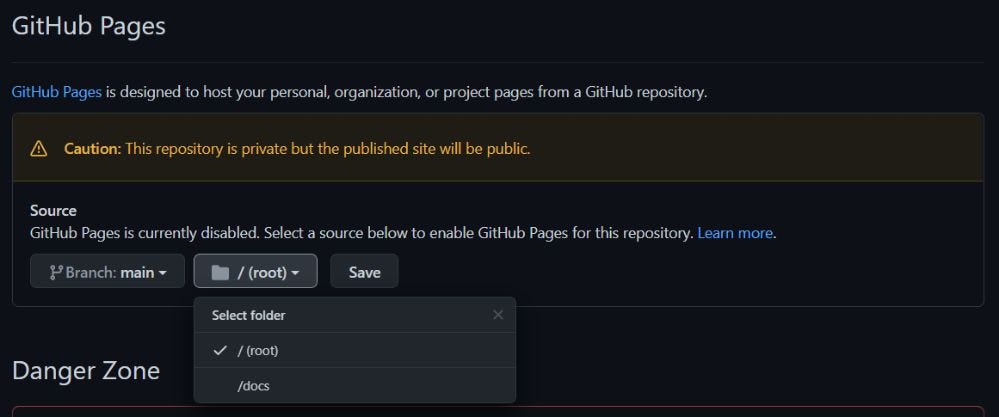
Hit the save push button.
You lot should at present see that Github is publishing your site. It may have a minute or 2, but it should give you the URL when it'southward finished.
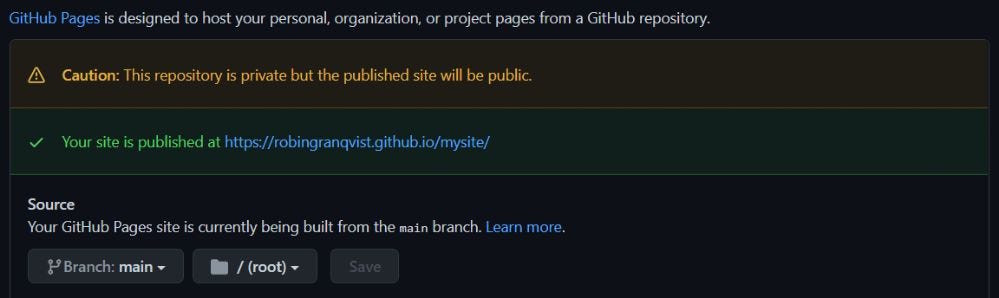
Great, it's now public on the internet.
Connecting a custom domain
Navigate dorsum to your repository settings and curl down to the "Custom domain".
Enter your domain in the input box and striking save.

This will create a CNAME file in your repository. Make sure non to delete it, it's quite important to keep track of your CNAME records.
Navigate to your domain name registrar and discover the settings for your domain. This pace is a fleck different for all registries, and so do a fleck of research or inquire the back up if you lot can't find it.
Github have their ain A records, so accept a look at their documentation to brand sure you get the latest ones.
You lot also want to set the CNAME records, and then you might want to take a look at this page of the official documentation to brand sure you set the right one.
Okay, that's it. Your domain should now be continued to your repository and after the DNS settings take updated y'all should exist able to navigate to it in your browser.
Astonishing.
Updating your site
When using Github, y'all have access to your source code straight in your browser through your repository.
If yous know basic HTML, CSS & Javascript, you tin edit the code direct through their editor.
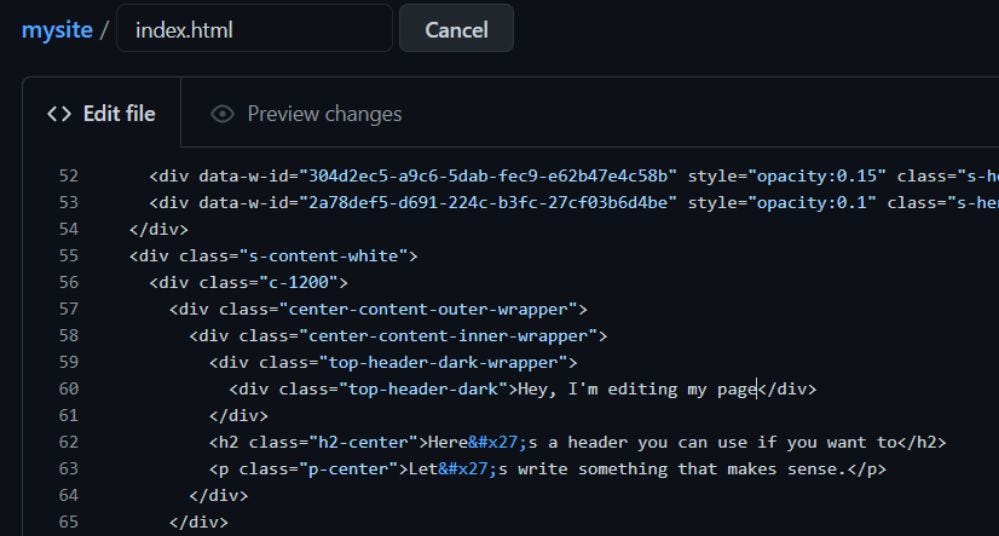
When y'all're done editing, simply press the "Commit changes" push button and the repository will update. These updates should be visible on your page almost immediately.
If you lot're not comfortable coding by yourself, yous can simply edit your site in Webflow and reupload & commit all your files to your repository.
This will make a new version of your site that will be bachelor automatically on your domain through the repository.
Okay, now you're done. I hope this guide has been useful.
If you rather utilize Netlify to host your Webflow sites for free, feel free to continue reading.
I as well want to let you know that I'm available to assistance if y'all accept had any problems, or if something in this guide isn't working for you.
Feel free to drop a message over at the contact page, and I'll go back to you lot asap.
Netlify
Netlify is a cloud based service that offers quite a lot of free tools to deploy, host and maintain websites and web apps.
The platform works through the Git version handling system, so you're able to use Github to upload your code and Netlify will automatically host any content you have inside a selected Github repository.
Deployment of static sites on Netlify
In this guide we will follow the almost unproblematic way to host your site on Netlify:
- Exporting code out of Webflow
- Upload the code to a Github repository
- Deploy the repository on Netlify
- Connect a custom domain
- All done
Hither follows a stride past step guide on how you tin can host your Webflow sites on Netlify for free.
Deploying your site on Netlify
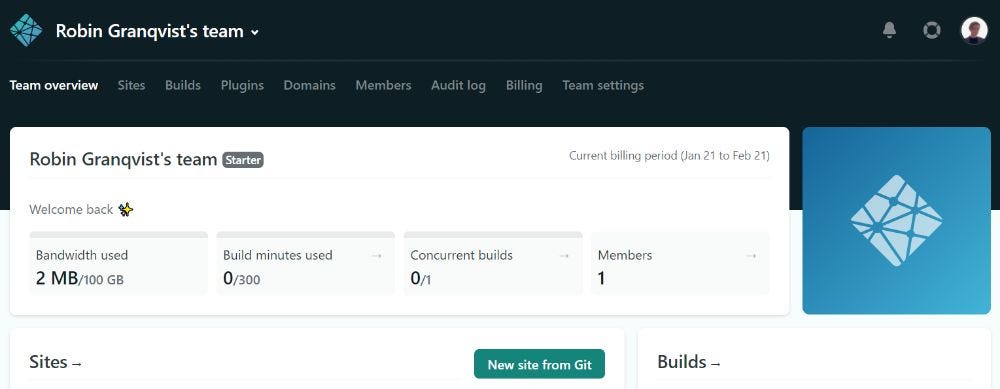
Kickoff off by creating your Netlify business relationship if you don't have 1 already.
Navigate to the "sites" tab on your profile, and striking "New site from Git".
Now y'all have to connect and authorize your Netlify account with your Github account.
Simply press the Github button on the setup page, and let Netlify to access your repositories.
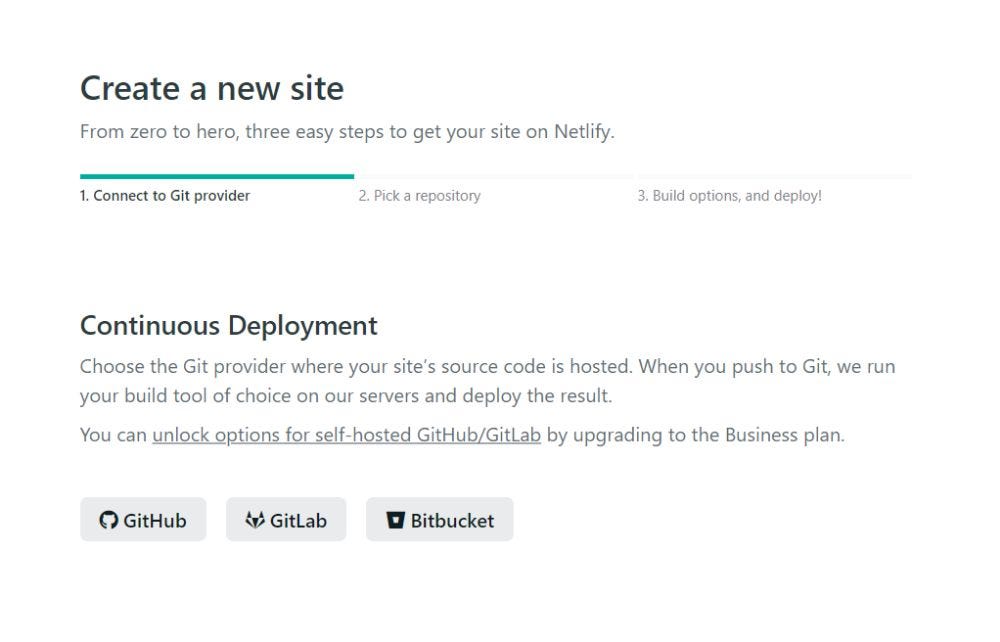
Now it's fourth dimension to pick out the repository containing your site. If you're new to Github you should only have one.
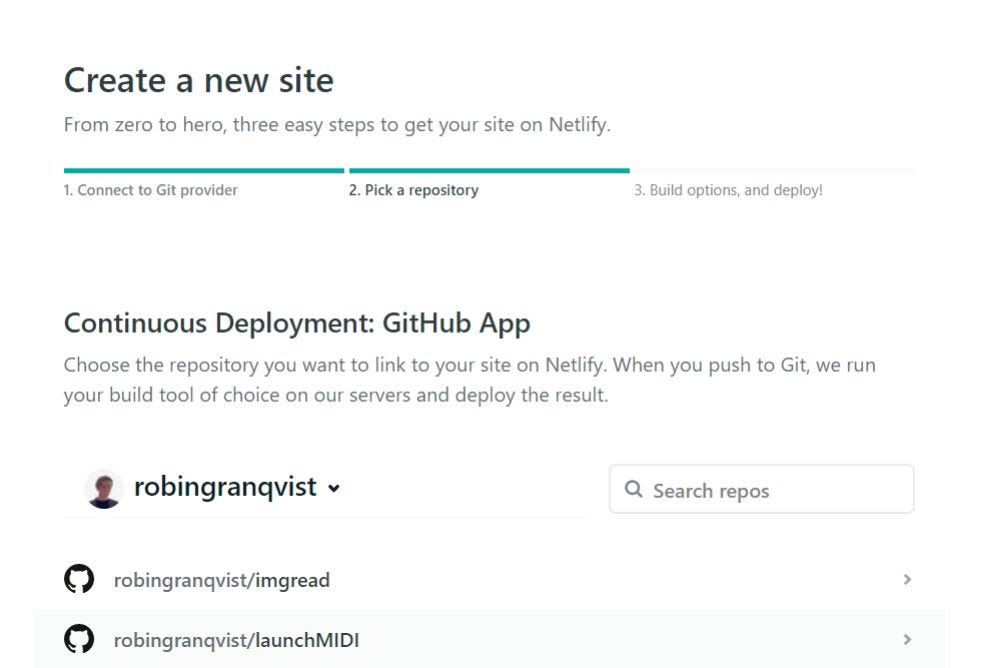
Select your repository and press go on.

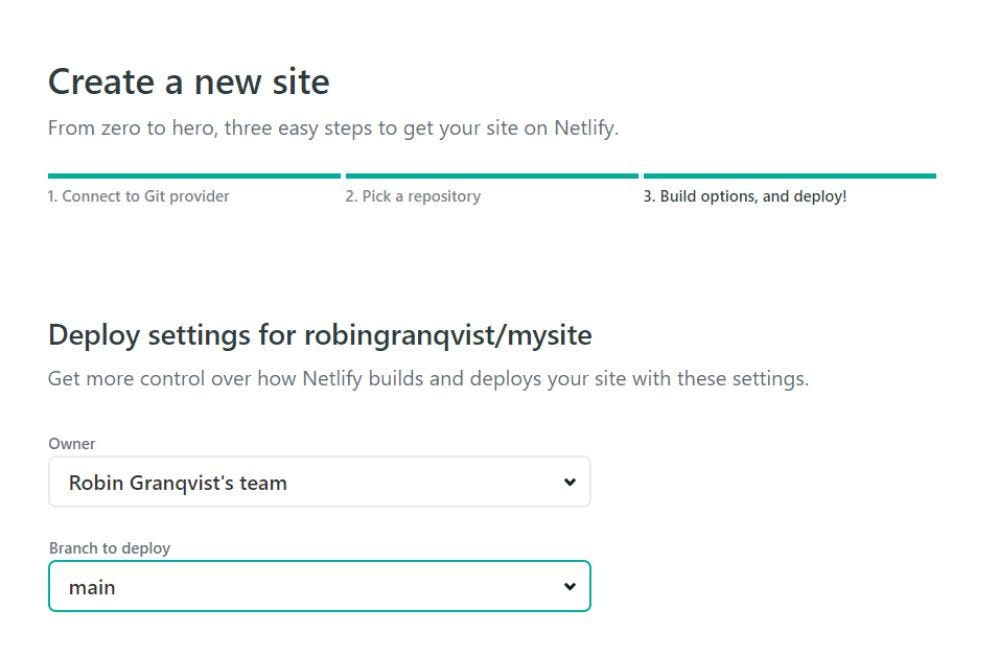
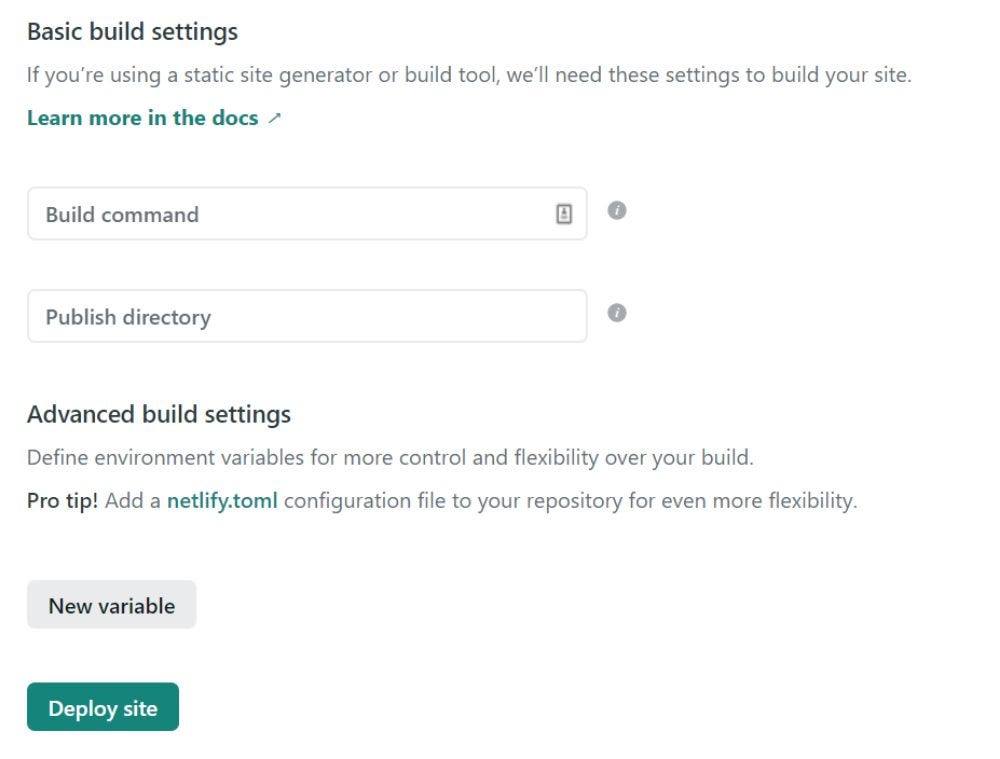
You shouldn't have to change any settings on the page that follows. Since yous're publishing a static site, you don't demand to add any build commands or edit any other advanced settings.
Now click the "Deploy your site" push button and let Netlify do its job. It commonly finishes actually fast.
The page will tell yous that Netlify is deploying your site. Information technology tin take a few minutes.
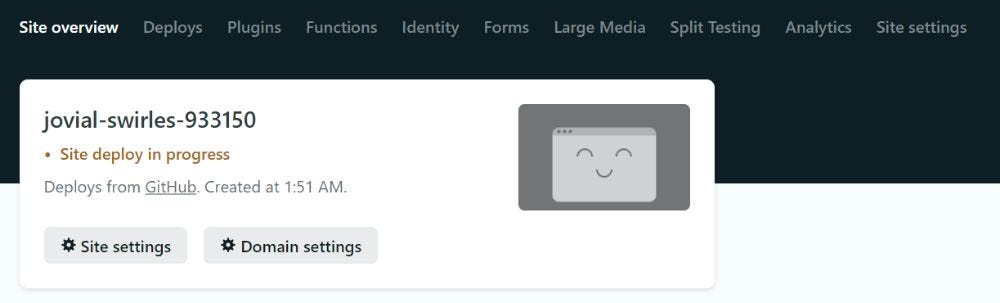
Okay, now you're done. You have successfully deployed your Webflow site on Netlify.
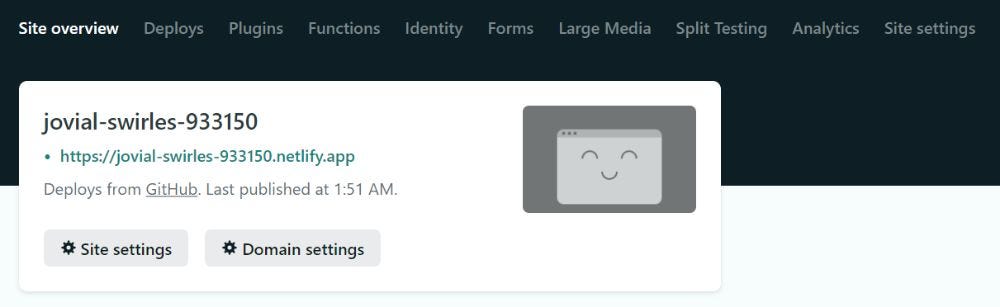
You should exist able to click on the random generated domain that Netlify provides you and access your site through your browser. Well done.
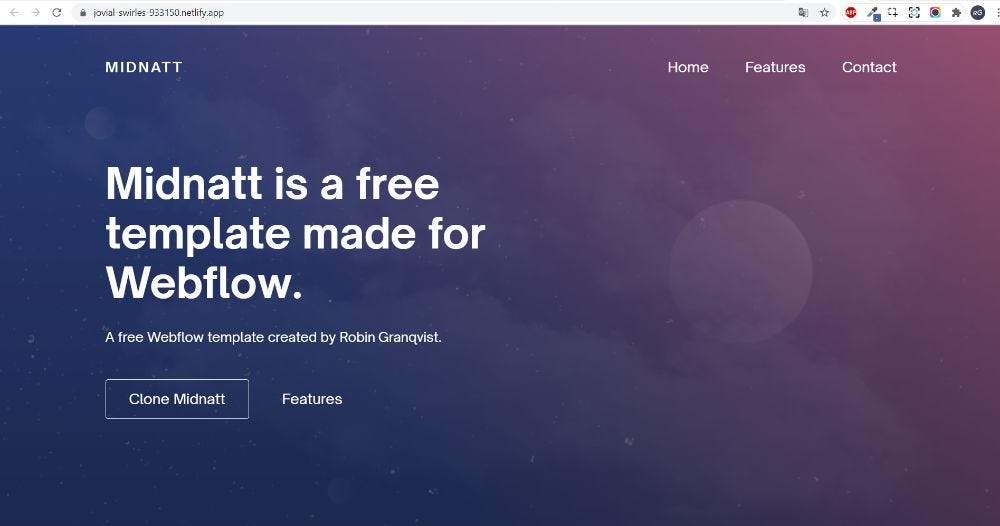
I decided to deploy my free Webflow template "Midnatt" that you can clone past clicking here.
The best function is that if you need to change anything on your site, you only need to consign the code out of Webflow and reupload information technology to your Github repository.
Netlify will automatically build out the a new version of your site anytime your repository is existence updated.
Allow'due south continue by connecting a custom domain to your site.
Connecting your domain
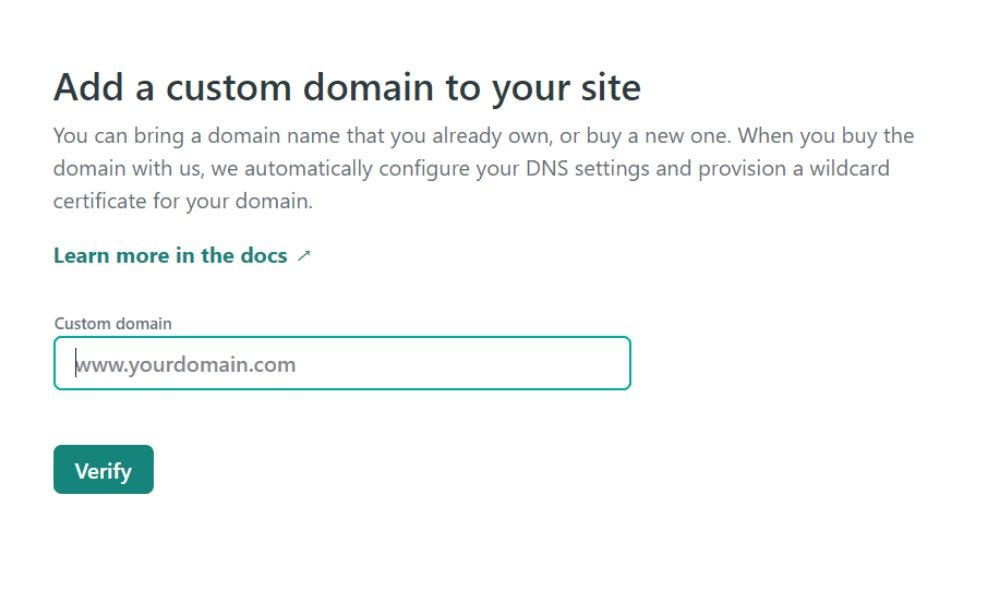
Head over to the site settings -> domain direction on Netlify. Here yous volition find all settings you need to connect your domain.
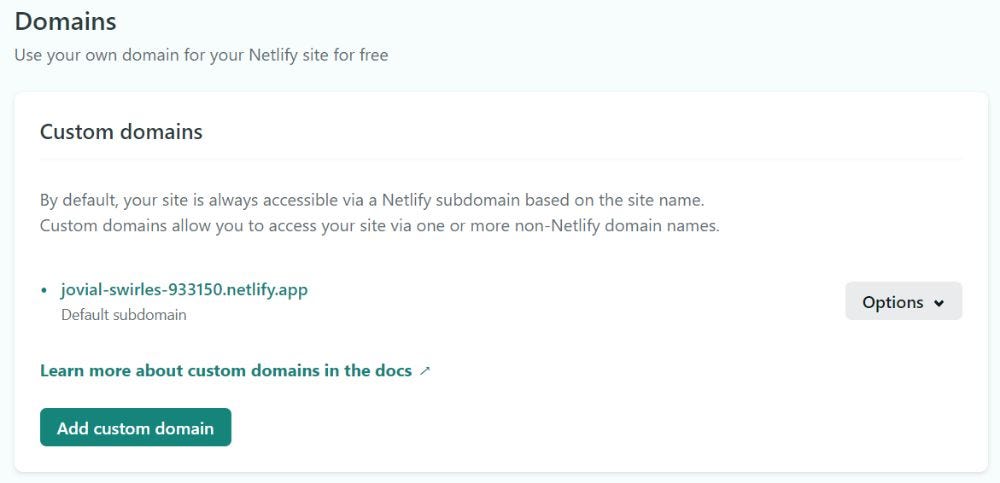
This setup works very similar to the way Webflow is connecting domains. You practice this by editing CNAME records and A records.
Yous can discover all information about what records are eneded on Netlifys official documentation.
After you're done it may take up to 24h for the DNS settings to update, then don't worry if you can't access your site through your domain right abroad.
Okay, now you're done. Your Webflow site is uploaded on Github, continued with Netlify and your domain is connected. Amazing.
And the best function is that you follow these steps over and over if you are one of those people who create lots of sites. Just create more Github repos and more Netlify projects. Astonishing.
Feel gratis to contact me if you lot accept whatever questions almost all this.
Take an amazing day,
Robin 1000.
Source: https://medium.com/waveshape-collective/hosting-webflow-sites-for-free-the-definitive-guide-561538b69f94
Post a Comment for "How to Upload Webflow to a Site"